amazon

Showing posts with label accuquilt GO. Show all posts

Tuesday, 25 October 2011

Win a Accuquilt Go Baby

Would you like to win a Accuquilt Go Baby


then check out
 a great site

Have fun sewing
Kim


Hexagon Challenges & Decisions

Day 5
Sitting with my foot up

I am feeling very  excited about this project.
As I rummaged through my stash of fabrics I  had forgot about just how many  fat quarters of fabric I had with sewing themes on them. 
Now that I have cut my hexagons and  I even fussy cut a few…. .the go cutter makes this process so easy….
ahhh I do love my Accuquilt GO

I need to decided about a design that will also suit my situation of sitting.

Design Brief…. make something fun to show my love of sewing using my sewing themed fabrics.

Limitations: Must be able to complete sitting  and with  hand stitching, with limited access to my gadgets & supplies in my sewing room. ( I do not want to risk sending DH into my girl cave to many times)

What can you do with a hexagon??????

After  doing some researching on the net…(yes laptop is close at hand), I found several designs.
  1. Tiled Hexagon arrangement – where hexagons are just stitched in rows  to create a pattern.
    • this design is very achievable with fabrics I have, I can just mix them up & sew, row after row. and would give a scrappy look.
  2. A Charm hexagon quilt – where every hexagon is a different fabric  stitched in rows.
    • this design I could achieve with the amount of different fabrics I have  however, I will only using one hexagon of fabric and I want to display more of each fabric in the quilt
  3. A grandmothers flower garden- where the hexagons are arranged into a flower shape then join together to create a second pattern. The flowers can be 2 rows big or 3 rows  or 4 rows  depending on final design.
    • this design shape is still my favourite but I think I will add a Kimzeee twist to it.
And the Winner is......
A  flower design  with  Kimzeee twist, it is to be.

Fabrics have been sorted into  light & dark backgrounds
Most of my hexagons I have cut at least 6 hexagons of each fabric and i can cut more  if needed.

so let the party & fun  begin

I need to mark my hexagons seam allowance….
Oh dear
I need some  more gadgets from my sewing room….
 Lucky son is home today I can send him to fetch…
 this could be fun
 as I  describe what he is looking for & where I left it last.
  1. 2 Marking pen – Pilot Frixion Pen, disappears with heat, a purple & a pink ( lucky they are my favourite colours)
  2. 1/4” clear plastic ruler – this is so handy
  3. sandpaper board-  this has fine sandpaper glued to a board that is perfect for marking as it grips the fabric
ok he found them … 
with a few yelling matches back & forward …
” try here or try here” ….
from me in the front of the house & him at the back of the house.

All gadgets found
marking hexagon seams
Marking all the 1/4" seam allowances in before I stitch
with my Frixion pen.

  now comes the fun bits 

arranging fabrics to create a flower shape
I am creating the  flowers by using  a light coloured center & dark petals or a dark center and light petals.
I lay them out on my board to decide arrangement

auditioning fabrics w
PC is keeping me company
running stitch seam w
join together the hexagons,
using a  small running stitch, 
from intersection of each corner to corner,
joining each piece to center piece until you have a completed flower
flower 1 w
Flower 1
hexagon flower 2 w
Flower 2
flower 3 w
Flower 3

Ok that's enough  fun for today

Have fun sewing
sewing - Copy
Kim

Monday, 24 October 2011

Hexagon Sewing Theme Quilt Project

4 days ago I had a foot operation,  3 days on pain pills & sitting  with foot elevated has lead  me to a new project, so I don't go completely nutty over the next 2 weeks, with  sitting & healing,  I needed a new project !!!!!!!
Now what can I do ?
I  have nothing prepared for hand stitching, every project I have is machine stitching.
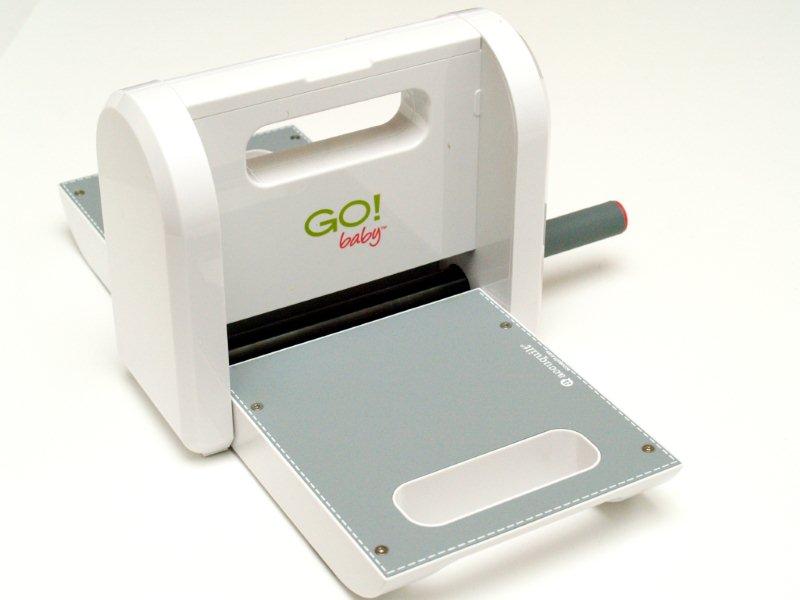
I have my Accuquilt Go cutter… now can I use this sitting in a chair with my foot elevated….????
I think I can if I just get DH to bring out my portable sewing table I got when I was 12.
This is very Dangerous sending DH into my girl cave, he might see all the stuff I really have…Smile
Now what Accuquilt cutting die do I want…..??? thinking-smiley
&
What fabric do I want to use????? thinking-smiley

I have been collecting fabric with a sewing theme for the past 6 years & I would love to do something with them.
Oh NOOOOOOOOOO
I have to send DH into my stash cupboard to get my container of sewing theme fabrics…

 SmileyShocked
Do I dare send him to my stash cupboard…..
There is no other way  to get it…. 
He returns with my very full container of fabrics….Open-mouthed smile with a smile…..pheeeeeeeeew
sewing themed fabric stash w

ok  Go cutter organised, fabric selected…
Now what pattern can I do or want to do….thinking-smiley

When I first started quilting and patchwork in my 20’s I made hundreds of 2” hexagons, cutting each shape individually, cutting all the paper templates & then stitching them into flower shapes   but  somewhere along the line when we moved houses they were thrown out as rubbish..grrrrrrrr and I haven't made one since.

But I did buy the hexagon die when I purchased my Accuquilt go cutter.
Looking at my stash of themed sewing fabrics  I think the  largest hexagon in the Accuquilt dies  would be perfect  for my project as it would show off the different fabrics designs.

accuquilt hexagon die marked

I have used a black sharpie to outline die

Accuquilt Hexagon die

Ok now can I cut these out sitting with my foot elevated..???

First I need to make strips wide enough to go over the 5”hexagon shape

Now normally I would cut  the strips using a rotary cutter & mat but that isn't possible in this position so I roughly measure  the fabric across shape and did the old fashion rip along the grain line.
While this is using  more fabric  this is all about achieving the end results and I have stacks of fabric Open-mouthed smile

strips made to cover die

now this strip, allows me to fold it over 3 times, but I can cut up to 6 layers at once Thumbs up

strip layered on die w

I then placed my well used protective mat over fabric & position the die to go threw the cutter.

hexagons in cutter w

Winding the handle until it is all threw the Go cutter..easy sitting in the chair

hexagons cut 1

Removing the cutting matt of fabric  you can see the hexagon shape cut out.

3 hexagons cut w

Removing the outside excess fabric and stash in plastic bag for other projects…
and
I have 3 perfect hexagons, cut in 10 seconds that  it took me to roll it threw the machine
and best of all, my  foot is elevated  & healing. 

hexagons cut w

Now too roll, cut, roll, cut, the day away

5 inch hexagons web
I have sorted the hexagons  into  lights (creams, beiges and white) backgrounds
  and dark backgrounds.

hexagons sorted lights and darks w

that's enough for one day
am feeling a little tired

but excited about this project.

stay tuned to see what I create with these hexagons over the next two weeks

have fun sewing

sewing - Copy

Kim

Sunday, 25 September 2011

Sewing Machine Stitch Library

Teaching students how to use a sewing machine is one of the pleasure of my job. Showing them what each part of the machine can do and how to get the different stitches. They experiment with scraps of fabric trying out the stitches.
Do you get excited when discovering a stitch  on your machine?
I certainly do.
The little icon they put on the machines to represent the stitches sometimes doesn't
DSC_3017  look anything like what it does on fabric, so I create a stitch library reference book,
 this also teaches you how to use your machine.
It records the changes you can make  in  Stitch length, Stitch width & thread type. 
When using a stitch I first do a sample of that stitch, record what I did. This gives me a a clear size & finish of the stitch & if I have used a different type of thread I also do a sample.
e.g. using invisible thread on a stitch
DSC_3018

Sometimes I am completely surprised with what the stitch will look like after your have adjusted it.
I use a plain cream coloured cotton fabric in various shades  to create sample pieces,
( I selected that because I always have plenty of creams in my stash  & makes it easy to see the stitches, you can also use calico for a cheaper option).

006

I also back them with a piece of cutaway stabiliser on the back of the fabric, this allows you to use just 1 piece of fabric.
The fabric then  has firmness so when I adjust the  stitches  they don't bunch up  and fabric doesn't pucker.
  I  cut them on  my Accuquilt GO because its so quick & easy  to use & makes them all the same size. I used the Go die 55019 – Square 4 3/4” which cuts 2 squares up to 6 layers in one pass through the cutter. ( 12 squares each time)
 007008009001

002I then draw some lines on the fabric to stitch on, I use a heat sensitive pen a blue  Pilot Fixion pen,  after I have stitched I can then  iron the lines off  leaving  just the stitches.010
On the top of each sample piece I write with a permanent pen  the type of stitches
 e.g.  Utility stitches, Decorative stitches, Quilting stitches, Embroidery stitches.
( this is how my machine manual sets them up, check your manual  for your stitch classifications )
then I underneath I use the  headings Stitch, Width & Length
003
Then stitch a sample of each stitch using a coloured thread so you can see each stitch clearly.
The first  row of the stitch is always  the automatic pre set in the machine
e.g.     Stitch        Width      Length
1                 0           2.5
then each row underneath is changing the width & length.
Some stitches have more options with changing the width and length  than others. I always like to do at least the smallest options & largest options.
005
Once I have all my stitches created,
(my Pfaff has 222 pre-set stitches not counting ones I can create & the numbers & lettering ) 
I group them together
004
I then  overlock the edges
DSC_3019
after overlocking I  give each sample a press to remove the stitching lines
DSC_3021
DSC_3022
DSC_3023
Then   you  bundle them up & decided on how you will keep them together
you could  save them on a clip
DSC_3024
or 
I like to keep them together with a ribbon.
Punch a hole in the corner with a hole punch
DSC_3026
& thread a ribbon through the holes.
DSC_3027         DSC_3028
DSC_3030
I keep this stitch library  with my manual of machine as well as pre-cut squares of fabric and stabiliser ready  for me to create new stitches for my projects. I can easily add to it at nay time without it talking too much time.
Whether you have just purchased your machine  or have had it a few years  you will learn something about your machine creating your own stitch library.
Have Fun creating your stitch library
Kim